Managing DNS Zone in Cloud Clusters
Cloud Clusters offers name servers to manage DNS records for your domain. If you are new to this, please follow the steps below.
Note:
- If you are using your own nameservers, you must make the "www" and blank DNS A records of your domain point to the IP address we provide in the Control Panel.
Add your DNS records
If you would like to change the your nameservers to ours, please click Enable DNS as illustarted in the following screenshot. In the meantime, you'll need to update the nameservers at your current domain registrar to our nameservers. The changes may take 2-24 hours to propagate.

1. Go to the "Manage DNS" page
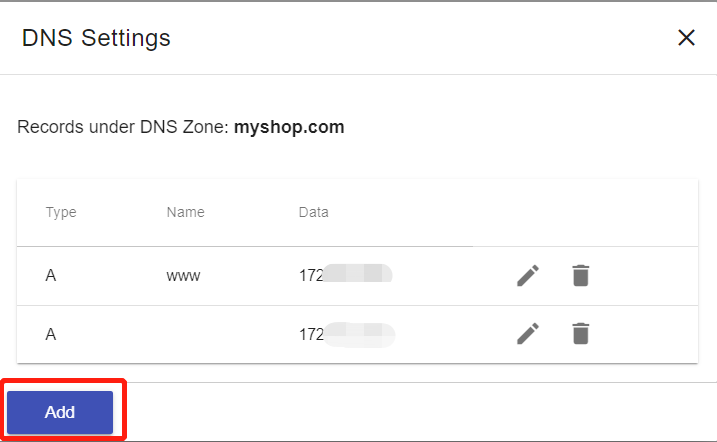
Click the icon at the end of the domain you just added, followed by clicking "Manage DNS". The DNS Settings dialog box will appear.

2. Add DNS records
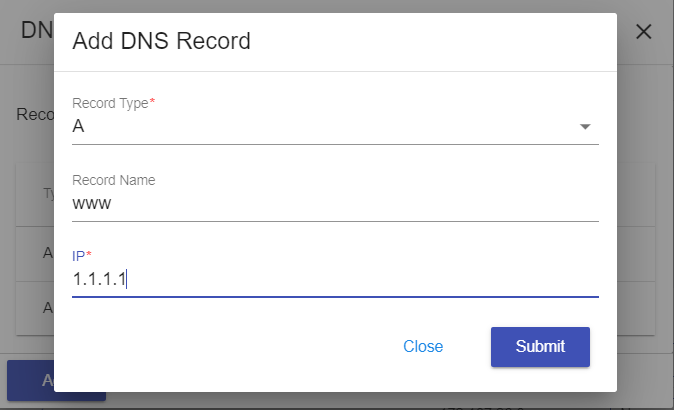
Click Add to add DNS records. We support five DNS record types, including A record, MX record, NX record, TXT record, and CNAME record.
Create an A record
An A record maps a domain name to the IP address (Ipv4) of the computer hosting the domain. By default, The system has created a blank A record and a www A record.
Create an MX record
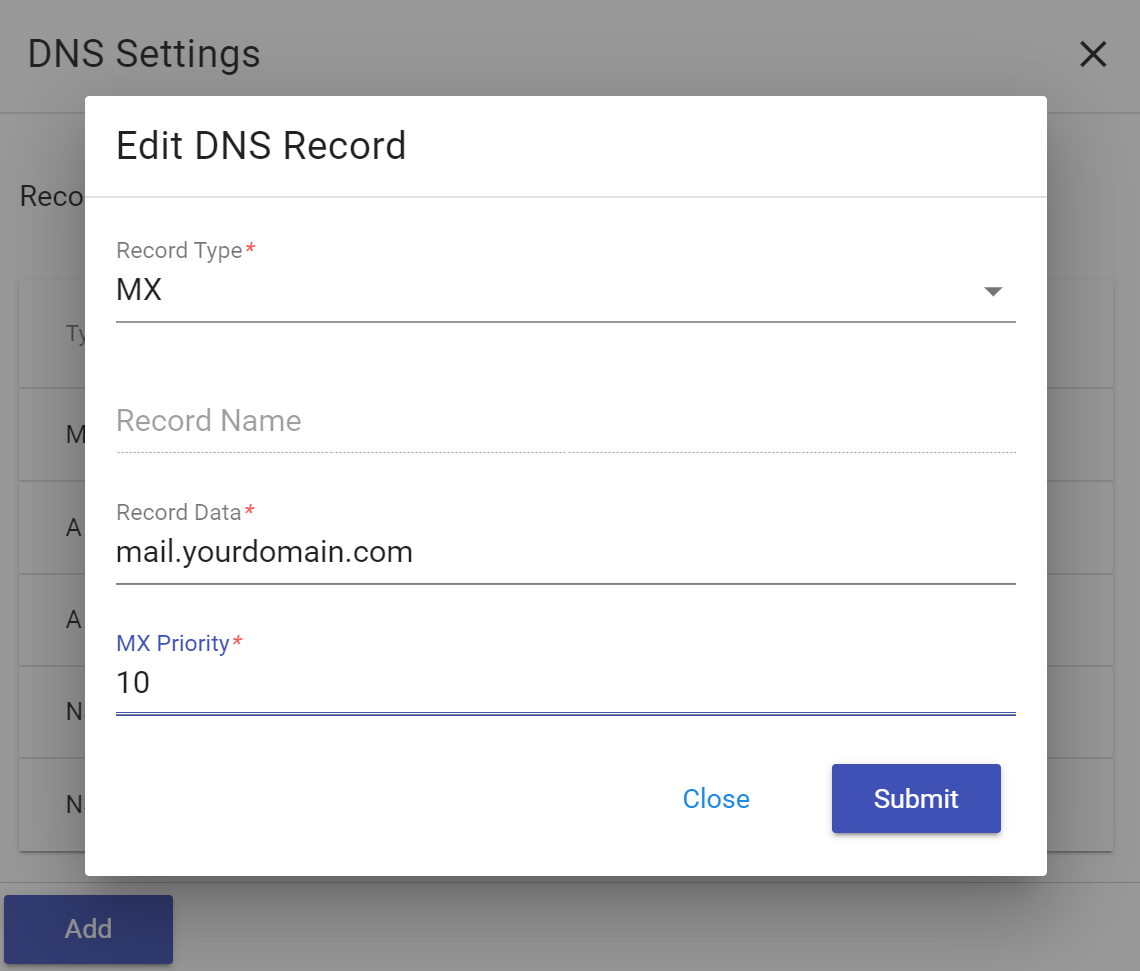
MX records are used to specify the e-mail server(s) responsible for a domain name.
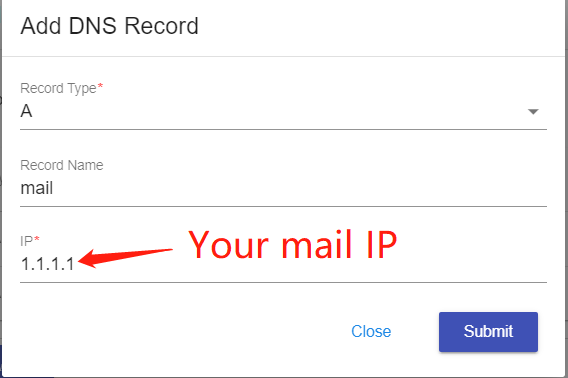
Before you create the MX record, an A record for the mail domain --"Record Name: mail; IP: Your mail IP" in this example -- should be created first.
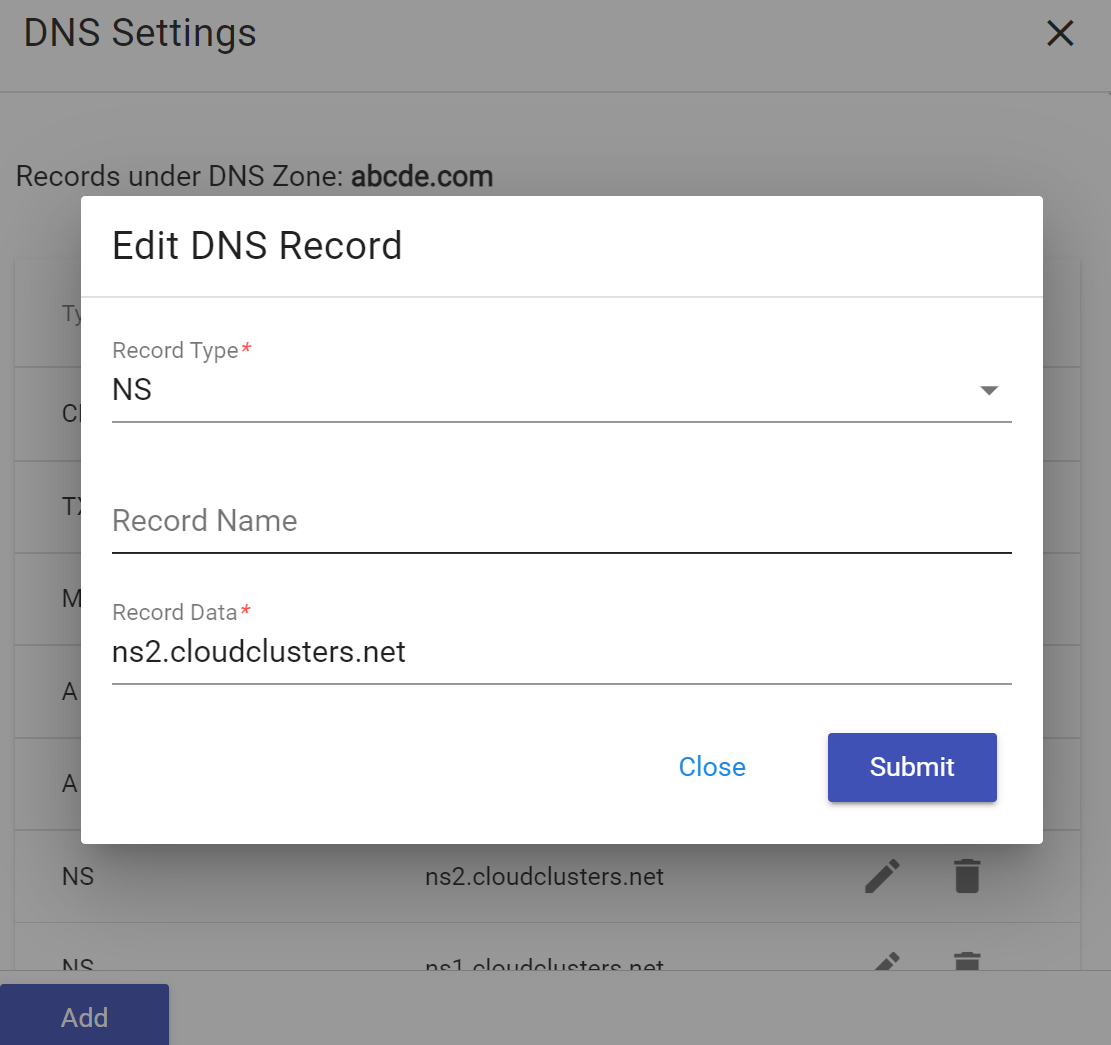
Create an NS record
NS records identify the DNS servers authoritative for a zone.
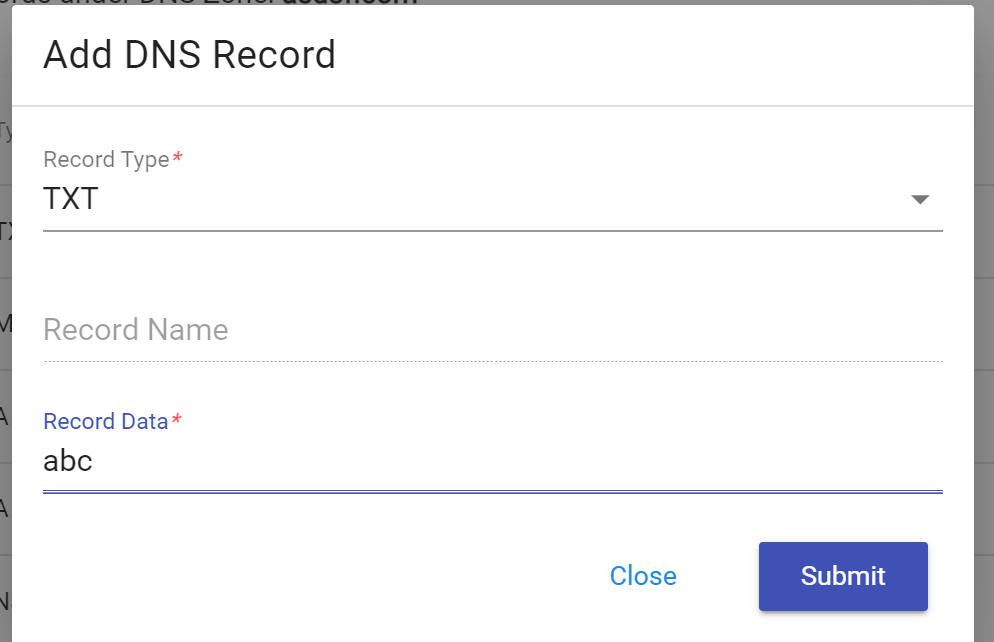
Create a TXT record
TXT records are used to provide the ability to associate arbitrary text with a host or other name
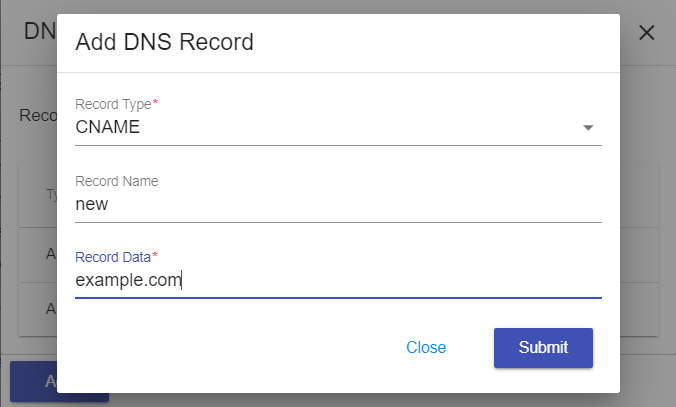
Create a CNAME record
CNAME records can be used to alias a hostname to another hostname.
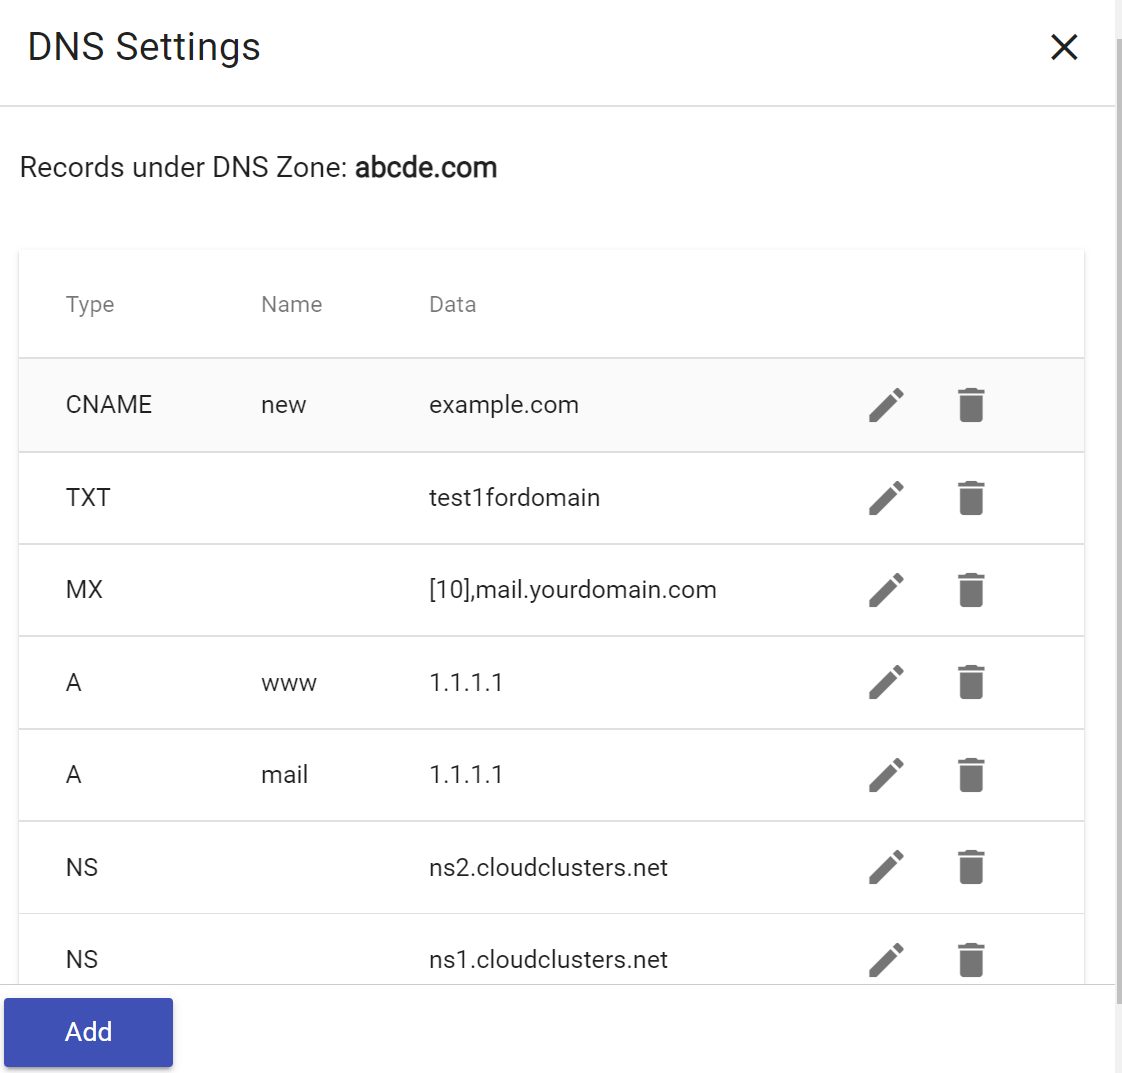
Once you've finished the settings, you can see all the records you created as the screenshot shows.
Should you have any question, please do not hesitate to contact us at support@cloudclustsers.io. We'd be happy to help.